📝 Part 1: Feasibility, Costs and Setup Overview – Planning Your WordPress Blog on Raspberry Pi 5
📝 Part 2: WordPress Installation Guide – Free Domain Setup with No-IP on Raspberry Pi 5
📝 Part 3: Final Deployment with Paid-Domain Migration and Backup Recovery on Raspberry Pi 5✍️ Editor’s Note: All technical steps were developed, tested, and verified by the author on a real Raspberry Pi 5 deployment. This blog post was drafted with assistance from AI to streamline the writing and formatting process so that the reader may seamlessly follow along and reproduce it.
📝 Part 1: Planning and Preparing –
Evaluating WordPress on the Raspberry Pi 5
👋 Introduction
This series explores how to host a WordPress blog on a Raspberry Pi 5 with full control, no recurring costs, and modern web standards like HTTPS. It started with a simple idea: host my own blog on hardware I owned — with minimal costs, maximum flexibility, and no reliance on third-party cloud providers. This idea quickly evolved into a full-fledged project powered by a Raspberry Pi 5, Ubuntu Server, WordPress, and dynamic DNS.
This post kicks off a three-part series where I walk you through everything I learned while:
- Choosing the best hardware for low-cost, reliable hosting,
- Evaluating the right CMS platform for the job,
- And laying the groundwork for a sustainable, scalable blog setup.
💡 Whether you’re a hobbyist, developer, or just curious about running your own site from home — this series is for you.
🔀 Raspberry Pi 5 vs Synology NAS:
Which to Host WordPress On?
I already owned a Synology DS1513+ and DS213 — both proven performers for storage and media streaming. But as I weighed the options for self-hosting a modern WordPress blog, a few issues became clear:
| Factor | Synology NAS (DS1513+) | Raspberry Pi 5 |
|---|---|---|
| CPU Age | Intel Atom (decade old) | Quad-core modern ARM CPU |
| Power Draw | ~50–80W (constant draw) | ~7–15W (idle to load) |
| Cost | Already owned, but aging | ~$120 with NVMe + PSU |
| Flexibility | Tied to DSM ecosystem | Full Linux + root control |
➡️ Verdict: The Raspberry Pi 5 offered better performance, flexibility, and power efficiency. It became the natural choice for this project. Newer sinology models in 2025 are significantly more power efficient but are still unable to match the Raspberry Pi 5 for efficiency and compactness for 24/7 operation
If you’re undecided between the 8GB vs 16GB Raspberry Pi 5, I wrote a detailed breakdown here to help you choose based on your workload.
🧱 Choosing a CMS to Host a WordPress Blog on Raspberry Pi 5
With hardware settled, the next question was software. I needed a platform that was:
Easy to Use
- Visual editor for content
- GUI-driven, low learning curve
- No need for Markdown or complex build tools
Feature-Rich
- Built-in blog support, SEO, and media handling
- Monetization support: ads, affiliate links, ecommerce
- Plugins for analytics, backups, staging, and more
Secure and Scalable
- Mature plugin ecosystem for caching, firewalls, etc.
- Easily migratable via plugins like All-in-One WP Migration
- Frequent core and plugin updates for security
✨ Alternatives I considered:
- Ghost: Beautiful and minimalist, but too limiting beyond blogging.
- Drupal: Powerful, but the learning curve was too steep for this use case.
➡️ Verdict: WordPress was a perfect balance of flexibility, community support, and scalability. And it’s free when self-hosted.
In the end, WordPress’s versatility won me over. It could grow with my blog, whether I wanted to add e-commerce, memberships, or other features in the future. WordPress is free if you host it on your own machine and it works across multiple hardware architectures. If you feel this guide might be too technical, they have a range of plans that are reasonably priced that can help you get started if you’re keen on getting straight to blogging:
💻 Hardware Tiers: Choosing the Right Setup for Hosting WordPress on a Raspberry Pi
While any Raspberry Pi can serve as a personal web server, choosing the right hardware setup can make a huge difference in stability, speed, and long-term reliability — especially when hosting something as database-intensive as WordPress.
Here’s a breakdown of the four tiers I recommend, based on your goals:
🧪 A) Basic Setup – For Tinkerers and First-Time Builders
Get started with the lowest entry point using SD cards and basic cooling.
| Component | Recommendation |
|---|---|
| Pi Model | Raspberry Pi 4 (4GB) or Pi 5 (4GB) |
| Storage | 32–64GB A1/A2-rated microSD card (Endurance-Class Types recommended) |
| Cooling | Passive heatsink or basic fan |
| Power Supply | Compatible 5v 3A PSU |
✅ Good for:
- Local experimentation and staging and running low traffic websites
- Exploring the Linux + WordPress stack
- Learning dynamic DNS, LAMP, SSL
⚠️ Important Notes on SD Cards:
- Look for A1 or A2-rated cards (Application Class), not just Class 10.
These are designed for sustained random I/O, essential for running an OS or WordPress. - Avoid generic or low-end SD cards. Even name-brand Class 10 cards may bottleneck performance.
- SanDisk Extreme Pro or Samsung PRO Endurance, or options from Kingston Endurance and Lexar Endurance are good picks.
🧠 Tip: Even this basic setup can feel responsive — but you’ll notice delays under plugins, large images, or higher concurrent visits.
🧰 B) Value Setup – For Stable Personal Hosting
A balanced and performant setup ready for low-traffic production use.
| Component | Recommendation |
|---|---|
| Pi Model | Raspberry Pi 5 (8GB) |
| Storage | 128–256GB DRAM-less NVMe with Hat |
| Cooling | Official Pi5 fan case or similar |
| Power Supply | Official Raspberry Pi 5 PSU |
✅ Good for:
- Hosting your own blog
- SSL, dynamic DNS, backups, basic plugins
- Reliable for consistent global access
💡 Even with just one NVMe drive and passive cooling, it performs extremely well, especially compared to NAS-grade CPUs or cloud VMs at this price point.
🧭 C) Recommended Production Setup – Cost Effective with True Backup Capability
The most feasible and upgrade-ready production-tier setup with built-in redundancy — perfect for those who value data resilience and operational stability.
| Component | Recommendation |
|---|---|
| Pi Model | Raspberry Pi 5 (8GB) |
| Primary Storage | 128–256GB NVMe with DRAM |
| Backup Storage | 64–128GB A1/A2/V10/V30-rated endurance microSD (mounted) |
| Cooling | Argon Neo5 NVMe Case or compatible (Ensure cooling solutions for both the Pi 5 and the NVMe) |
| Power Supply | Official Raspberry Pi 5 PSU |
| Backups | Scheduled via rsync, tar, or UpdraftPlus (files + DB to SD card) |
✅ Good for:
- Fully operational WordPress blogs with HTTPS
- Scheduled database/file backups on-device
- Upgrade-friendly: add a second NVMe or UPS later if needed
💡 This is arguably the “sweet spot” for solo developers, homelab enthusiasts, and small creators. It gives you real production confidence — without RAID, complexity, or cost creep. This is the exact setup I’m currently using.
🚀 D) Industry Grade Setup – Max Performance and Uptime
Best suited for heavy-duty or multi-site hosting, advanced failover, and self-managed infrastructure.
| Component | Recommendation |
|---|---|
| Pi Model | Raspberry Pi 5 (8GB) |
| Storage | 2x 128–256GB DRAM NVMe (RAID 0 optional) |
| Cooling | Active cooling (case fan + heatsinks for Pi + NVMe) |
| Power Supply | Official PSU + inline UPS |
| Backups | On-device (Endurance SD or Raid 0 NVMe Configuration) + offsite (rsync, NAS, cloud) |
| Monitoring | UptimeRobot, cron alerts, logs shipped to remote host |
✅ Good for:
- Full-time hosting
- Custom PHP/MySQL services
- CI/CD pipelines, Git-based WordPress deployment
- Uptime-critical blog or portfolio
🛡️ If you’re planning to host for others, run CI/CD pipelines, or keep your site online no matter what, investing in proper thermal dissipation and power backup is essential.
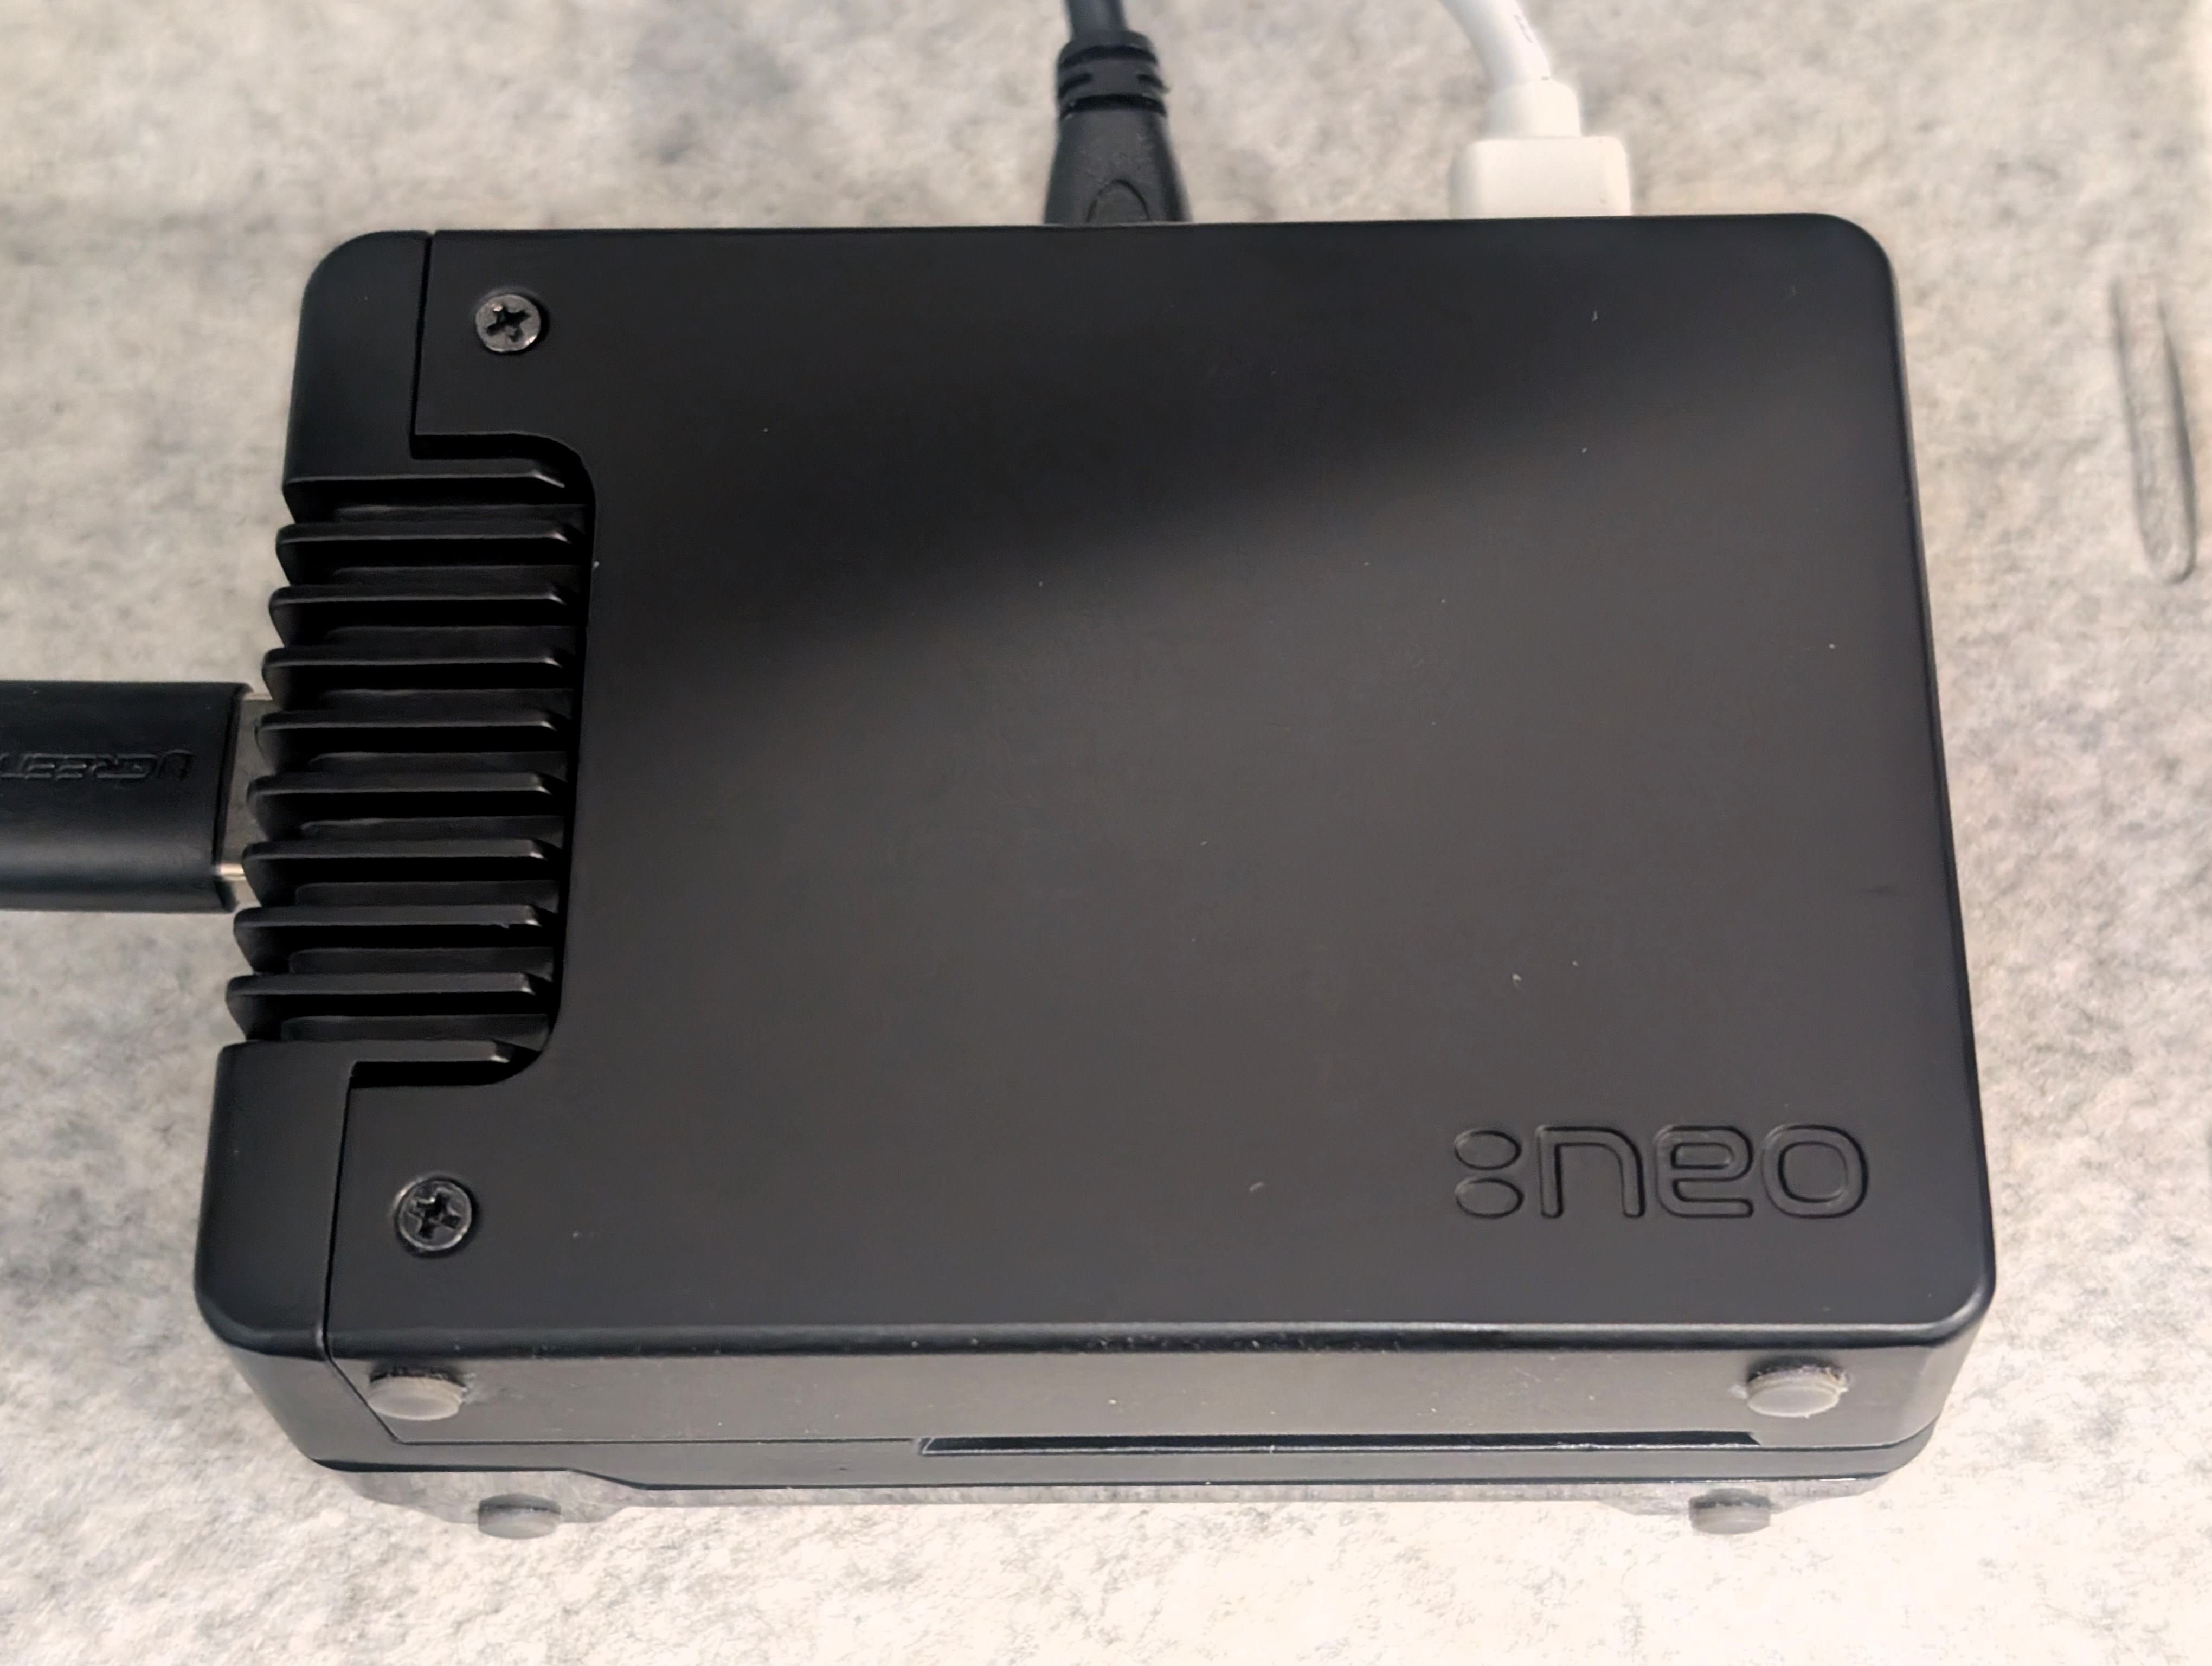
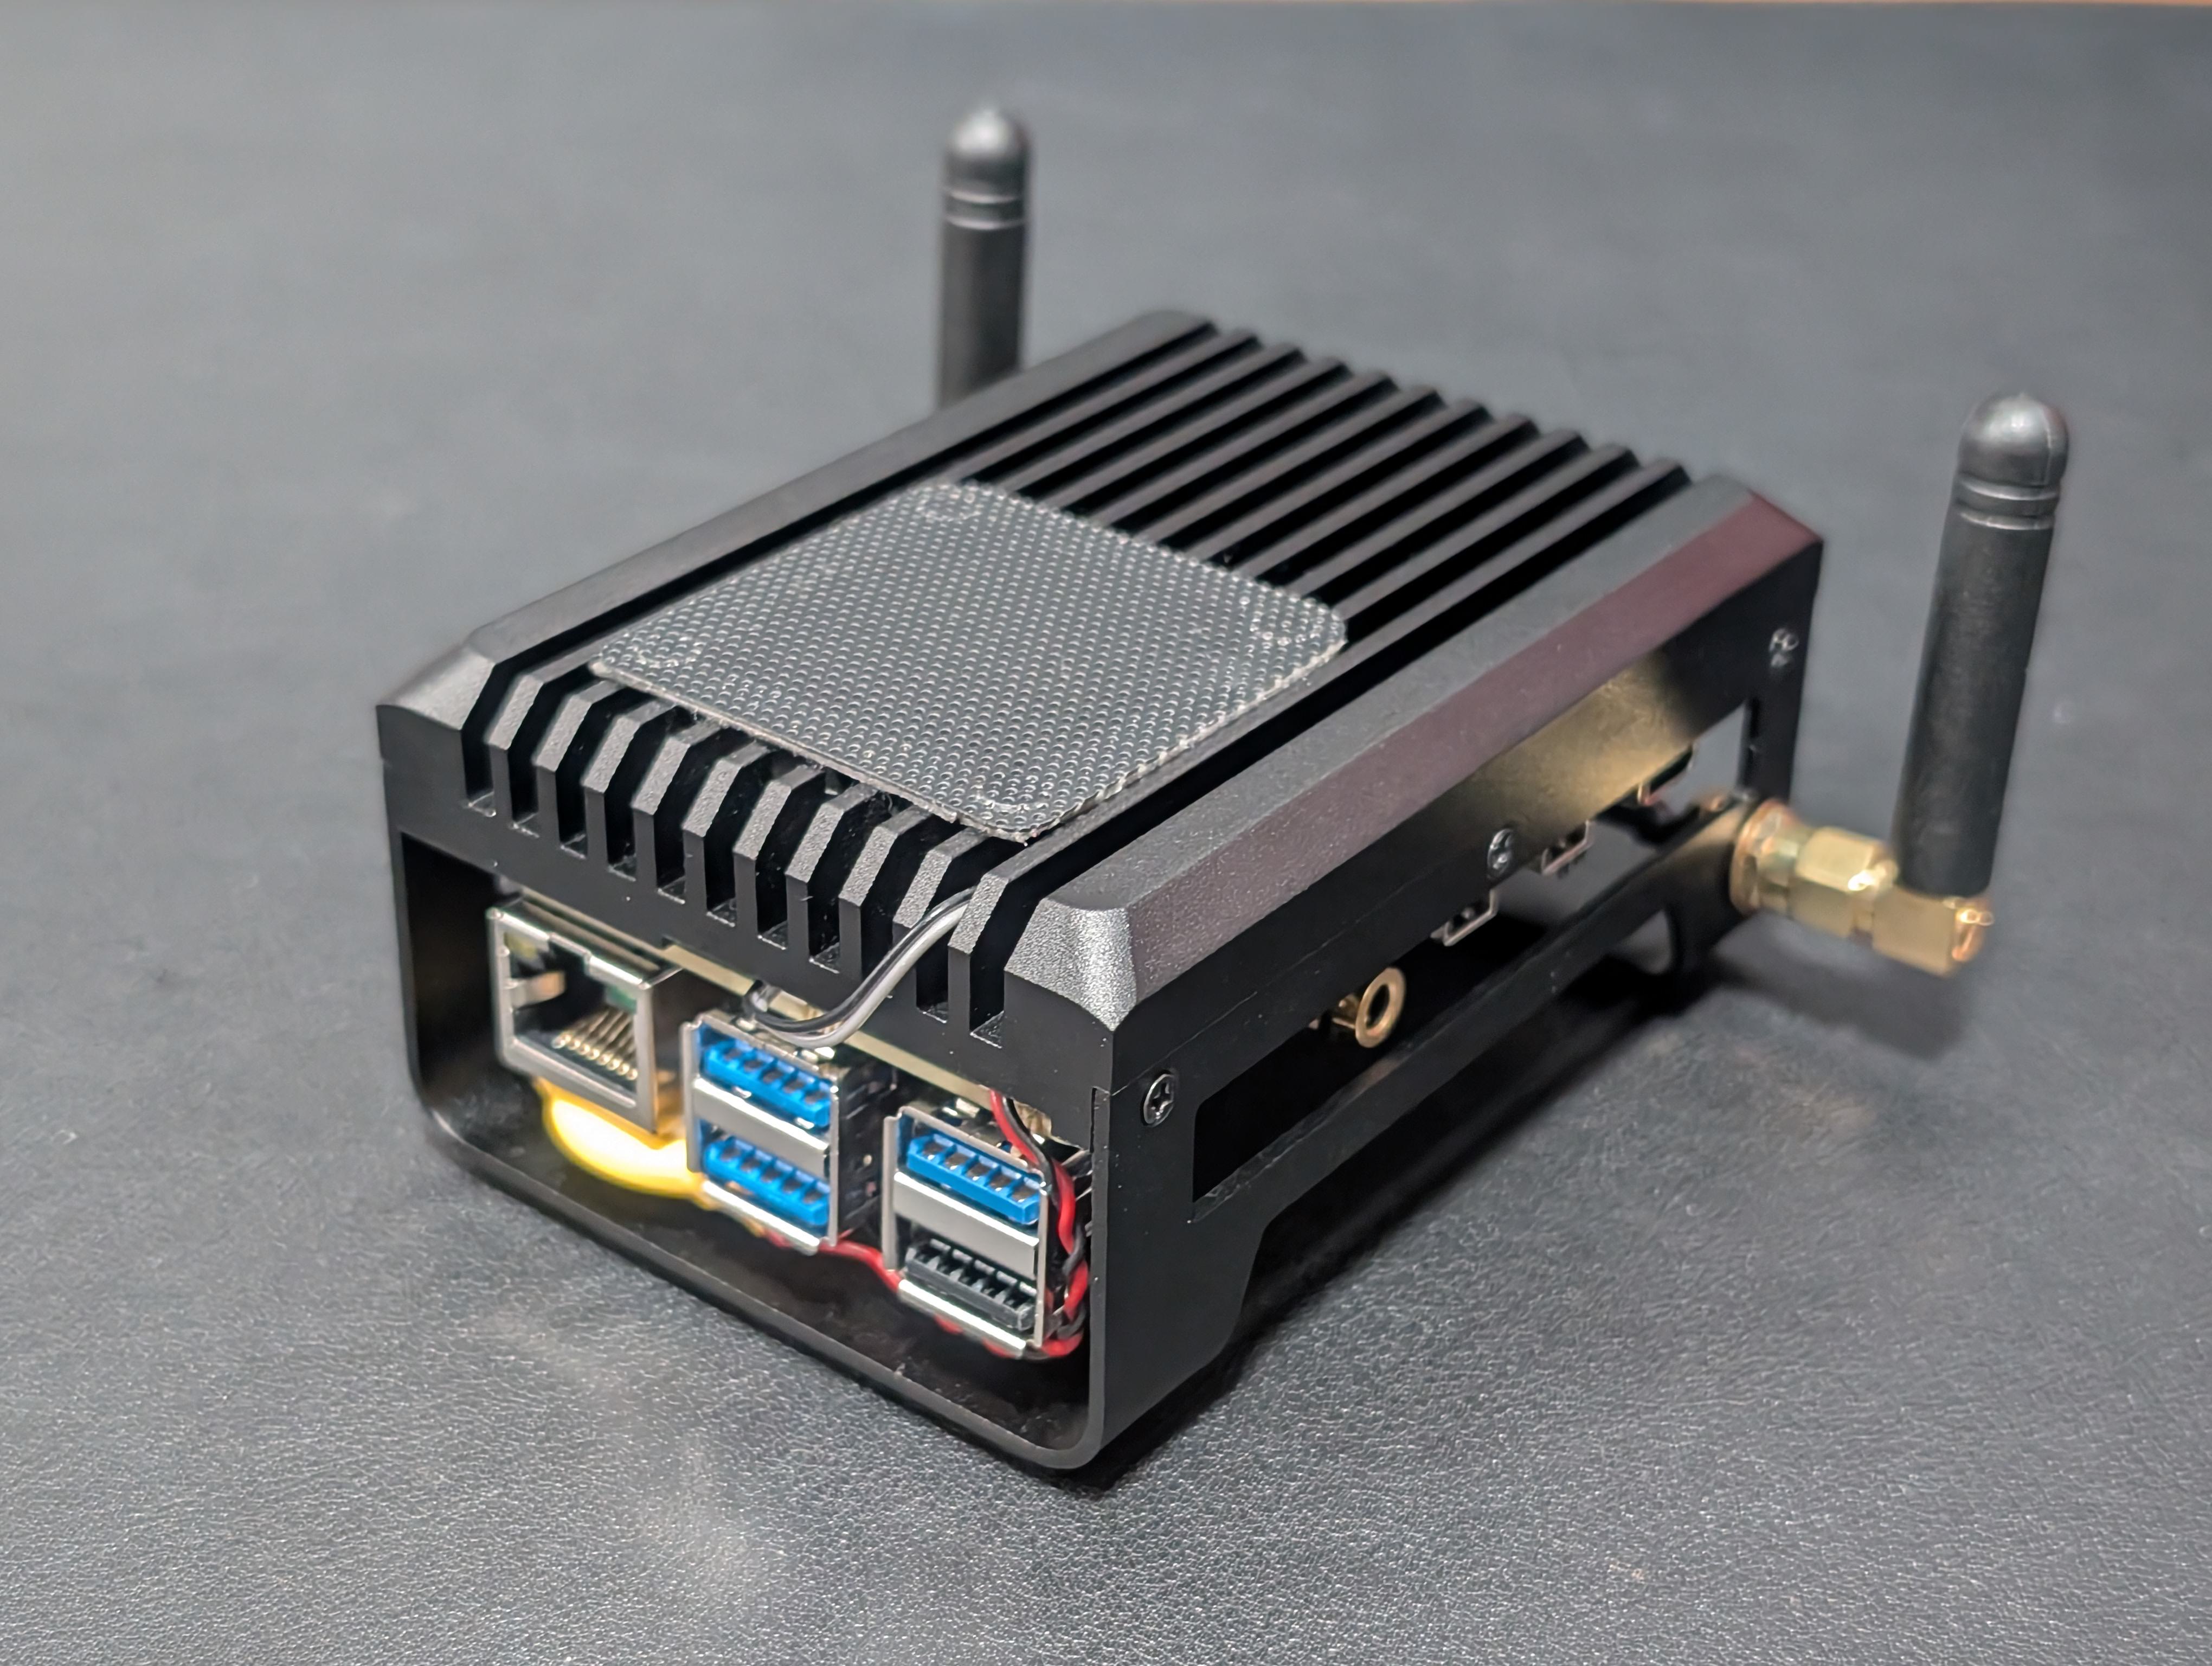
📷 A Look at My Setup (Recommended Tier)
📸 [image caption: “The mentioned Raspberry Pi 5 running WordPress in an Argon Neo5 case with NVMe”
- Board: Raspberry Pi 5 (8GB)
- Case: Argon Neo5 with integrated PCIe NVMe
- Drive: 256GB NVMe (DRAM)
- Backup Storage: Lexar 64GB V30 Endurance-Class SD Card
(Note: This is a performance storage card and not meant to run Operating Systems, ie. no A2 Rating) - Power: Official 5V 5A PSU
- Cooling: Passive (no fan needed under normal loads)
I’ll be sharing the full upgrade to the production-grade RAID+UPS setup in Part 4 (coming soon), once I complete testing and migration.
🧠 Hardware Takeaways:
No matter which tier you start with, WordPress runs surprisingly well on Raspberry Pi — especially when using optimized storage and a secure setup like what we cover in this series.
If you’re unsure where to begin:
- Start with the 🧰 Value setup — it strikes the right balance between performance and price.
- The choice of hardware in that will then seamlessly transition to the 🧭 Recommended Setup as your traffic grows with minimal changes.
⚙️ Preparing the Raspberry Pi 5 to Host a WordPress Blog
Step 1: OS Setup
- Installed Ubuntu Server 24.04 (64-bit).
- Flashed using Raspberry Pi Imager to an NVMe drive.
- Set a static IP via my router (e.g.,
192.168.X.X) to avoid DHCP conflicts.
Step 2: LAMP Stack Installation
To host WordPress, I needed:
- Apache: Web server
- PHP 8.3: WordPress-compatible backend
- MariaDB: Lightweight, drop-in replacement for MySQL
There were a few bumps:
- Apache wasn’t parsing PHP initially → fixed by enabling
mpm_prefork. - MariaDB user setup required careful privilege assignment for WordPress to connect.
🚧 Challenges & Solutions
🌍 Dynamic DNS with No-IP
My ISP didn’t offer a static IP. So register (your-staging.ddns.net
➡️ Result: My site could always be reached globally, even if my public IP changed.
🔐 SSL with Let’s Encrypt
Securing the site was non-negotiable.
- Installed Certbot to issue free SSL certs.
- Redirected HTTP to HTTPS via Apache’s
VirtualHostconfig. - Result: Clean green padlock + encrypted access on all devices.
🐛 The Dreaded Database Error
During setup, I hit:
“Error establishing a database connection”
Turned out to be a wrong password in wp-config.php. A quick reset of the MariaDB user credentials fixed it.
🧰 Post-Install: WordPress Plugin Stack
Once WordPress was installed, I added my essentials:
| Plugin | Purpose |
|---|---|
| Yoast SEO | SEO optimization and meta tags |
| Wordfence | Firewall and brute-force protection |
| UpdraftPlus | Scheduled and manual backups |
| Site Kit by Google | Analytics + Search Console integration |
Theme-wise, I kept it simple and professional to ensure fast loading.
🧠 Why Bother Hosting WordPress on the Raspberry Pi 5?
I could have used:
- WordPress.com
- Medium
- Ghost(Pro)
But here’s why I didn’t:
| Benefit | Self-Hosting with Raspberry Pi 5 |
|---|---|
| Full Control | Own the entire stack — OS to CMS |
| Cost Savings | One-time hardware + free hosting + minimal power costs |
| Learning | Hands-on Linux, DNS, SSL, and Apache |
| Customization | No limits on themes, plugins, or ports |
📊 Quick Comparison: Hosting Platforms
| Feature | Raspberry Pi 5 | Synology DS1513 | Free Blog Platforms WordPress.com, Ghost, Drupal |
| Setup Complexity | Medium (requires Linux skills) | Low (Synology DSM is easy) | Low to Medium (depending on platform) |
| Performance | High (modern hardware) | Low (outdated CPU) | High (cloud-hosted) |
| Initial Costs | ~US $120 (NVME + PSU) | ~US $500 | Free |
| Running Costs (24/7) | ~USD $14.49/year | ~USD $103.50/year | US $44.66/year (WP Personal Plan) |
| Flexibility | High (full server control) | Medium (limited by DSM) | Low to Medium (depends on platform) |
| Scalability | High | Medium | Medium to High |
| Security | High (manual setup) | Medium | High (managed hosting) |
🎓 Lessons Learned
This project wasn’t just about hosting a website—it was a journey of discovery. I learned how to:
- Configure and secure a Linux-based OS and host WordPress on the Raspberry Pi 5.
- Overcome challenges like database connectivity and dynamic IPs.
- Appreciate the power of open-source tools like WordPress and Let’s Encrypt.
By following this approach, anyone can host their own WordPress blog on a Raspberry Pi 5 — a reliable and affordable platform for self-hosted websites. If you’re considering hosting your own blog, I highly recommend starting with a Raspberry Pi 5. It’s powerful enough for most personal projects, affordable, and endlessly customizable.
🔜 What’s Next for WordPress on the Raspberry Pi 5?
In Part 2, we’ll cover the hardware configuration and deployment in greater detail:
- Fully install WordPress with secure Apache and SSL with detailed commands for the setup process
- Setup and use No-IP for a completely free domain solution for global reach
- Build a production-ready stack on the Raspberry Pi 5
Building this blog was a rewarding experience. If you’ve been inspired to try something similar, let me know in the comments or reach out with questions!
I like it when individuals get together and share ideas. Great site, keep
it up!
Thank you for the kind words and the support! Will continue to keep exploring and sharing!